WEEK 9
WORK CONTINUES
“Designing for a Future we Want”
Andreas invited me to join the “Designing for a Future we Want” seminar as he meant it would be insightful for me. It was nice hearing someone from the industry discuss a topic focusing on the future state of design. Mariana Amatullo was the talker and presented a lot of useful information that I can take note of for my project. She mentioned that design goes beyond the pursuit of beautiful and functional forms and that we should embrace a design attitude as a cognitive ability to enact change.


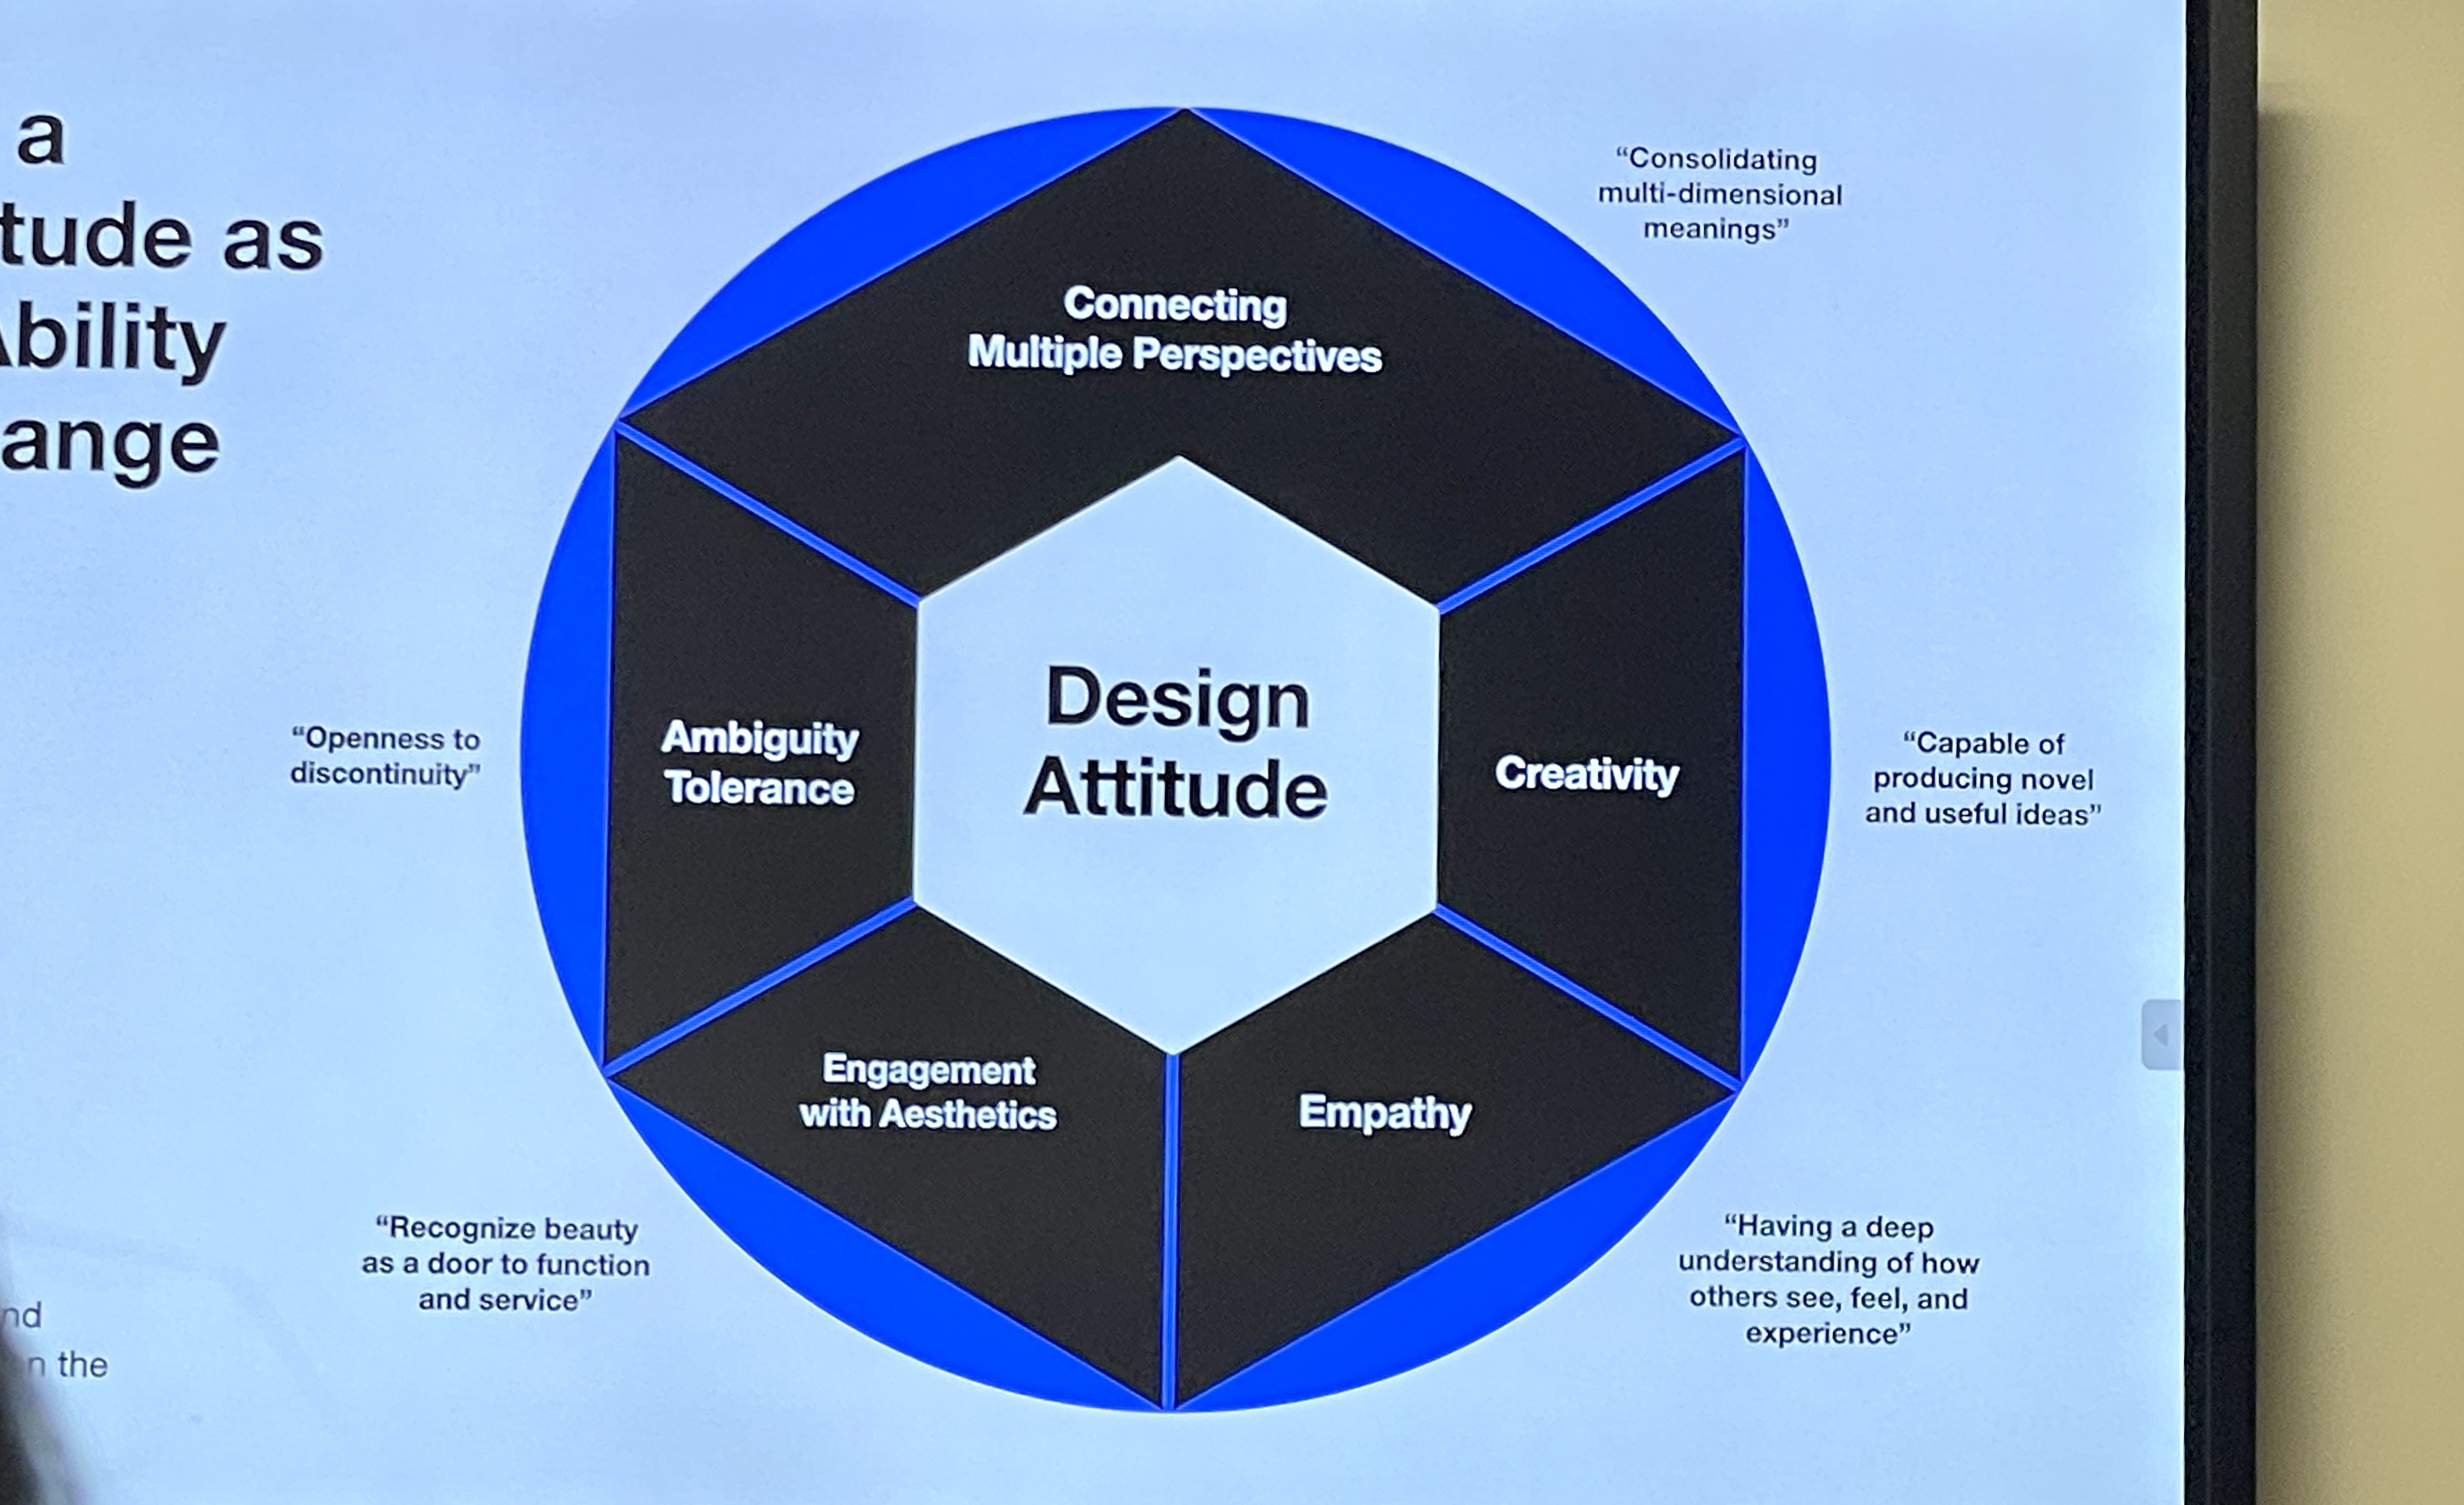
Design Attitude.
I expanded my knowledge by learning about what a “design attitude” is. It is a critical factor that requires both at the individual and organisation level to leverage design thinking for innovation. As I found this useful for how to approach my project, I mapped out each section I have so far and what I can do further.


Connecting multiple perspectives:
Not only is my final toolkit beneficial for designers but also for the visually impaired since there
will be designs that are built for their community. With the designed toolkit, others without visual
impairments can get a sense of how visually impaired individuals approach and experience design.
I can go further by thinking about what kind of design should be used with the toolkit. Graphic design
(posters, publications?), digital interfaces (website?)?
“Consolidating multi-dimensional meaning”

Ambiguity tolerance:
As this said, I am open to finding other solutions that can better benefit my product instead of the ones I already have. As I intend to incorporate the sense of touch into my toolkit, perhaps this will transform my product into something different? Could it also be a possibility to include all five senses?
“Openness to discontinuity”


Engagement with Aesthetics:
So far I haven’t thought much of how the final interface can look like, but I’m opting for something simple, yet eye-catching.
“Recognizing beauty as a door to function and service”

Creativity:
For semester 1, my outcome will be more general and not entirely unique since there are already existing visual impairment simulators online. However, I am incorporating a tangible element to it, which differs from what’s already existing. For semester 2, I will continue developing something more unique.

“Having a deep understanding of how others see, feel, and experience”

CONSULTATION FOR CPJ AND CATALOGUE OF MAKING
During the consultation, we went through my CPJ and Catalogue of Making. I was told to start creating a
design for my CPJ, ideally leaving more space because my layout feels cramped right now. I can try out
doing mock-ups in either Illustrator or Figma.
For my Catalogue of Making I can use the same design as my CPJ. I should have a bit of text to give
enough context to the reader as it is insufficient now. Same here I should have a layout with a better
flow.
SERIAL COMMUNICATION WITH ARDUINO AND P5.JS
I followed this tutorial: https://medium.com/@yyyyyyyuan/tutorial-serial-communication-with-arduino-and-p5-js-cd39b3ac10ce

Part 1: Preparing the Arduino Board for the System
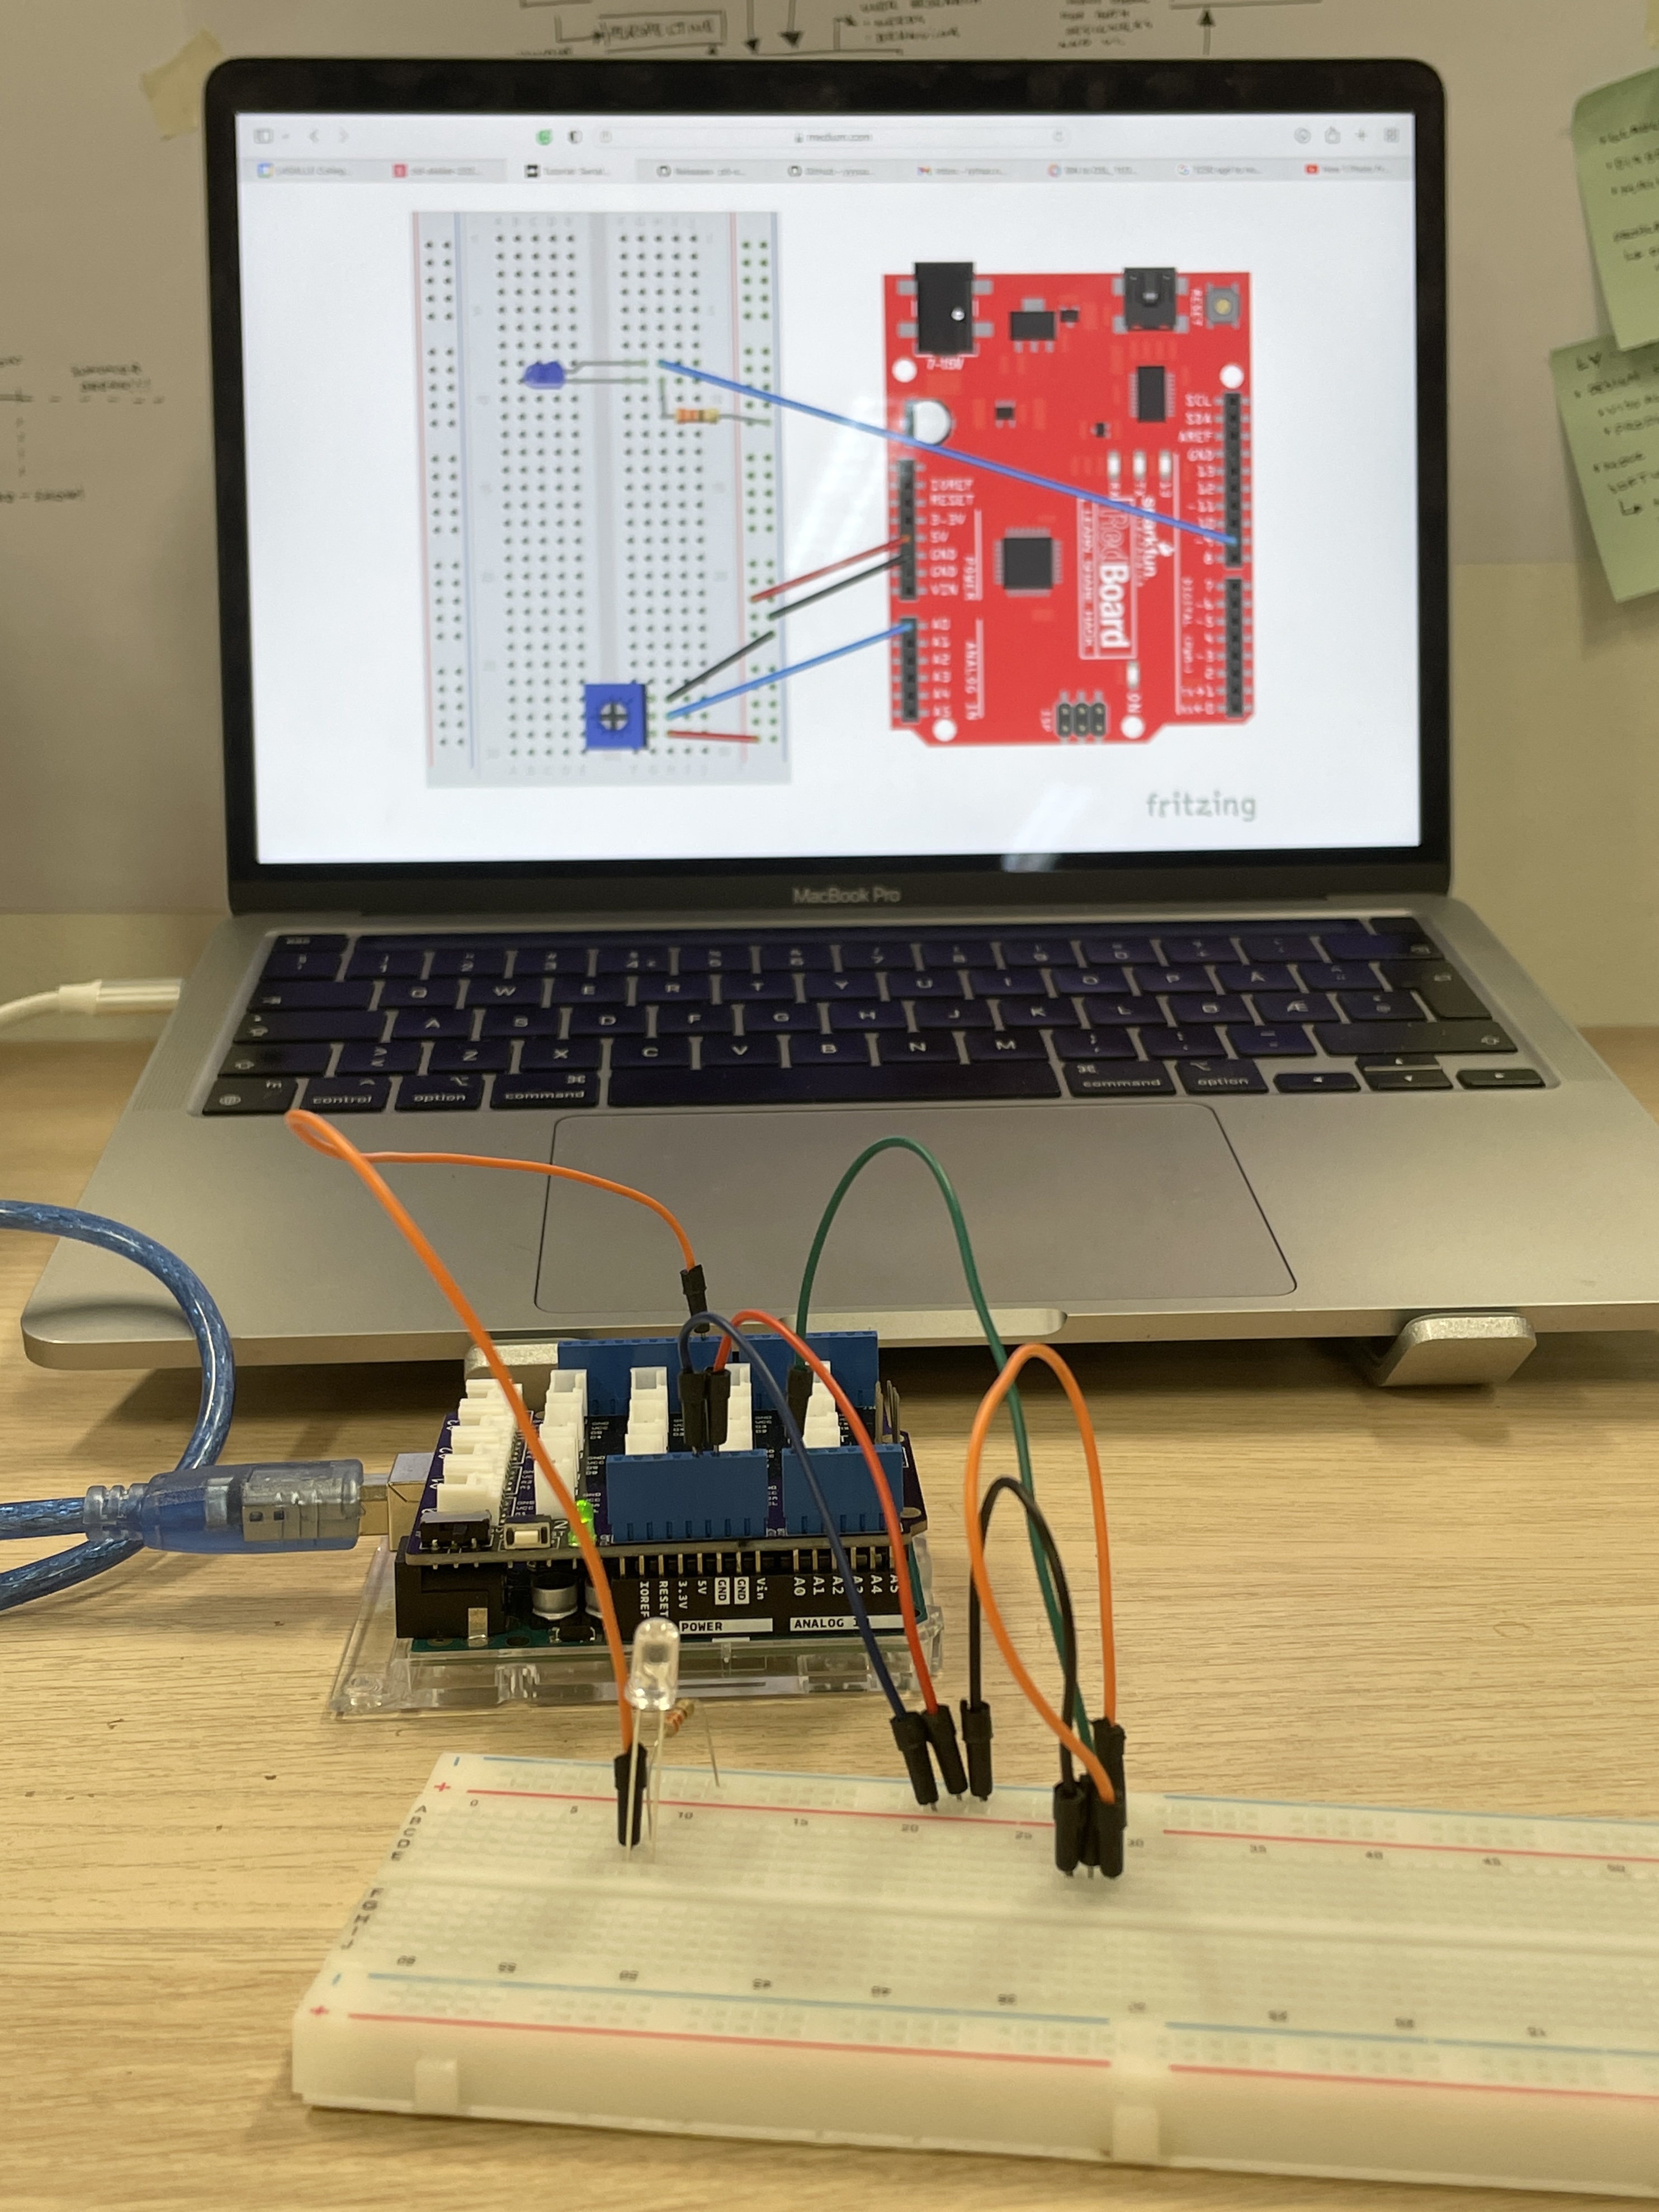
By completing Part 1 I was able to adjust the lighting of the LED light.

Part 2: p5.js Read from Arduino Board
I followed the tutorial and had high hopes for it to work, but no, it didn’t. Did I set up the Arduino wrongly with the wrong code? Did I download the wrong app? Did I manage to modify the port variable for serial communication? These were the questions I wondered about, but found that the issue was the p5.serialcontrol freezing midways.
p5.Serialcontrol. The application would freeze midways, making it difficult to continue the tutorial.
I switched from Safari to Google Chrome and it finally worked!
Serial communication Part 2. It works!
By completing Part 2 I was able to use the potentiometer to adjust the brightness level of the left screen in p5.js.

Part 3: p5.js Write to Arduino Board
Modified the Arduino sketch and in p5.js added a controller for input to control the LED light from the browser.
Serial communication Part 3. It works!
Serial communication. The green LED inidicates that the slider in p5.js works, whereas the blue LED light indicates that the potetniometer works.
By completing Part 3 I was able to change the brightness of the right side of the screen with the slider.
OVERALL REFLECTION
This tutorial helped me understand how to set up HTML/JavaScript pages (p5.js sketches) to communicate
with a microcontroller (Arduino). This is what I learned:
- How to set up Arduino for sending information to a browser-based app.
- How to set up p5.js so a browser-based application can read serial input sent by the Arduino.
- How to set up p5.js and Arduino, so the web app can control Arduino with serial output.

WEEKLY ROUNDUP
It took me a good full week to finish the tutorial because the p5.serialcontrol app wouldn’t work. I did
get frustrated because it halted my other experiments, but I am happy that it finally works! This
tutorial will most likely be very useful for me when developing the toolkit further. It allows me to
learn and play with both something tangible (potentiometer) and digital (slider).
Additionally, this week made me aware of my time management – not that I do things last minute – but
that I spend more time on each experiment than I initially set myself to. Most of it is because I
exclude the possibility of encountering issues – something I have regularly done up to now. Even if
there are 6 more weeks until submission, I do feel a bit scared about not reaching my goal for the
semester. But, of course, it’s achievable, so I will keep my heads up!